Showing posts with label scrap busting. Show all posts

Monday, November 28, 2011

Rainbow Wrap - A Wonderful Scrappy Gift

Again, keeping to the Scrappy Theme, I just completed the wrap you see above and I found it to be one of the most wonderful projects I have tackled in quite some time.  It's called The Rainbow Wrap by the Rag Merchant.  I can't find a website for the company, but found numerous vendors selling this, and other, wonderful patterns by this company.  If anyone out there knows Jill Abeloe Meade or anyone connected with her company, the Rag Merchant, point me in the direction of that website.  I want to do more of her creations - they are gorgeous.   Below is a cover shot of the pattern. 
OK, back to the wrap.  Seriously, I am going to find it impossible to give this away.  I saw this wrap on the shoulders of a vendor at the Jacksonville Quilt Fest in October.  This vendor wasn't selling the pattern - she was simply keeping warm.  If you've ever been to the Jacksonville Quilt Fest you are nodding in understanding right now - that place is air conditioned so well you could store meat there with no concerns of it going bad.  I digress, but it's true.  OK, back to the wrap - I was struck by its beauty and once I realized that it was made entirely from scraps strips of batiks, I squealed like a pig!  This wrap is gorgeous.  It feels as good on you as it looks.  Last night after I finished mine I wrapped it around my shoulders while I worked on some paperwork and it was positively cozy.  Not too heavy, but just right and oh, so soft.  I immediately realized that this wrap would be wonderful on a car trip, airplane ride, or even in a movie theater.  As you will see, this wrap is not only gorgeous, it's incredibly versatile. 

Worth mentioning is that this wrap is extremely easy and fun to make.  It took longer to sort and cut the strips than it did to sew it up.  As stated on the pattern, "The frayed edge wrap is constructed of narrow strips of bright cotton fabric and it's trimmed with bias binding.  For best results use fabrics that look good on both sides like the batik fabrics..."  While constructing this, you get to use all those fancy stitches on your machine that we can never think of what to use them for.  If your machine is limited in decorative stitches, no worries, the pattern shows you how to use just a straight stitch that will make it just as lovely!  It's so fun to make and wouldn't this make the perfect gift?  To give you ideas for color choices, I found some photos of finished wraps online and I also included the one I saw at Jacksonville.  Aren't they gorgeous?  Also worth noting is that the wrap finishes 18 inches wide and it is light enough to fold in half and use as a regular scarf if you need a traditional scarf in cold climates.      

Monday, November 7, 2011

How About a Scrappy Christmas?

There's still time to make some spectacular scrappy Christmas gifts!  I just completed a few gifts that were very fast and very inexpensive.  I already had everything I needed to make these projects, so other than my time, they were free and during these not so great economic times, what could be better?
Above and below is my newest creation for new mommies - the play mat quilt. The one that is sashed with white fabric was made for my newest Granddaughter, Nora.  My daughter loves it because it's only about 40" x 40" and very easy to grab, throw down for a quick diaper change, or to lay across the couch when Princess Nora is propped up in the corner of the couch where she "holds court".  It truly is a very versatile quilt and because it's not very fancy, there is no fear of ruining it with use.  It's made to be used!  Utilitarian in nature, it really doesn't look it if you pick striking fabrics.   
 In fact, my daughter liked it so much I made a "boys" version for her to give to her friend when she has her baby boy.  That one is shown above and is sashed with lime green.
Here is a close up of the label and the simple quilting I used.  Oh, and below you see a gratuitous shot of Nora, happy as can be, giggling on her quilt.  Isn't she a cutie pie??
The quilts are made from 5" squares.  I didn't use charm packs as I wanted to use up scraps.  It takes 49 -  5" squares.  The sashing is 1.5" strips that when finished give you 1" sashing.  Once complete, I quilt it myself using a decorative "soft" zig-zag stitch on my Janome and away I go.  What could be easier? 

And from previous blog posts, here are great inspirations made entirely from scraps, that I think go nicely with the play mat.


Of course, I had to make a quilted scrappy bib, using my Quilty Indulgence Toddle Bib pattern...  It really does wash like iron and last just as long... I made the bib using 3" squares with 1 inch sashing. 
There are more yo-yo toys to come... I am becoming obsessed....

Monday, August 8, 2011

Updated Scrappy Toy Bag

Here is the updated Scrappy Toy Bag after the name change. I even embellished both sides with wonderful flowers made from the Clover Kanzashi Flower maker. Even they are made from scraps and old buttons! This is definitely my Scrappy Summer.... Oh, and I am putting the label on the quilted play mat that also goes in that bag and as soon as that is done I will post photos of that as well. Oh, unless I get "the call" and have to grab my suitcase and run to the airport. WooooHoooooo! A whole week of nothing but grandchildren! Does it get any better than that??? NOPE!

Monday, July 11, 2011

Scrappy Balls

OK, so I am a few days late (probably Linda's fault) but I think it was more than worth the wait, wasn't it? Here's this weeks scrappy project, Scrappy Balls. What child doesn't like to toss around, or hopefully roll, a colorful ball? They ALL love to play with balls! These are made from 100% scraps - and a bit of new stuffing, a lot of love and very little time.

Aren't they happy balls? I had a pattern for a medium sized ball, similar to this one, and then I simply enlarged it twice to make two bigger balls and then I reduced the original to make a smaller ball. The directions are here...

Isn't is a wonderful set of balls? And seriously, this is a very easy project. My girlfriend, Renita, will attest to this. She was very skeptical so I invited her over and she was amazed at how easily and quickly these little stash busters went together. Renita was so pleased with her balls that she took them north with her to give as a gift! I loved them so much I am making a scrappy bag for them to go into. Wait until you see that! It is going to my newest grandchild when she is born at the end of August... this scrappy summer is mighty productive...


**UPDATE: Roni took the challenge and I am thrilled!! Go visit her place and see what she is up to... Sadly, Mare has NOT taken the challenge. She has instead opted to go to somewhere in the Great White North to swat mosquitoes or some such thing... I have faith that if she ever finds her way out of there, she will participate. That's IF she makes her way out of there...

Saturday, July 2, 2011

My Scrappy Summer

This summer I am bound and determined to use up some of this copious stash. That is my goal, and as a result I will be posting photos of projects that use up stash. I will be posting every week. Hopefully YOU will be inspired as well.


This weeks project was the YoYo Elephant you see above. The pattern comes from Indigo Junction and is as easy as pie. It uses the Clover YoYo maker in two sizes. I used about thirty 5 1/2 inch scraps and about thirty 4 1/2 inch scraps plus some little bits for the head and the ears. By my quick mental calculations, that's about a yard of Aunt Grace scrap pieces gone. Wonderful! What child wouldn't have fun with this? So, a bit of my Aunt Grace scraps gone, and a treat for a granchild. Win-win in my book.

Mare, I am challenging you to attack your stash, too! Can you do it???

Roni, don't think you are getting off scott free. I challenge you, too!!! Now get sewing!!

Tuesday, June 29, 2010

Come One, Come all! Bib Class in Clearwater!

I will be teaching a Quilted Toddler Bib class at Country Quilts and Bears in Clearwater, Florida on Saturday, July 10th. The class will run from 10 a.m. until 4:30. Many will leave earlier than 4:30, but if you want to make a day of it, you certainly can! We really have fun in our classes there!

The Quilted Toddler Bib is a fabulous blank canvas that allows you to practice and learn any and all of the following if you are interested:
* Basic piecing
* Machine embroidery placement / personalization
* “Whole cloth” stipple, meandering or grid quilting
* Hand or machine appliqué
* Bias binding creation and application


You leave this class with a smile and a finished project in hand. You also leave with nearly all the skills necessary to create the Quilted Toddler Jacket. My bibs can be bought on etsy - my shop is: http://www.quiltyindulgence.etsy.com/

Above is my darling Granddaughter, Lucy, wearing the small size bib on her first birthday. See how well she is covered? It is marvelous! Coverage isn't the only plus for this bib, either. It wears like iron. It can be washed over and over again and is as comfortable as an old quilt.

These patterns sew up to make great gifts and with the holiday season fast approaching, it is a wonderful addition to your repertoire! I can promise you that once you make one bib, you will have to make more! They are great stash busters, too. You can use up those orphan blocks you have laying around. You can make a bib or two from leftover charms or jelly rolls. You can use plain denim with the edges finished in bias binding and no quilting.... the options are limitless! Let your imagination soar!


Monday, June 29, 2009

Scrappy Pineapple Quilt Blocks


UPDATE 3/12/2010: I have uploaded the FREE 6 Inch Paper Piecing Pineapple Block Pattern to end of this post.

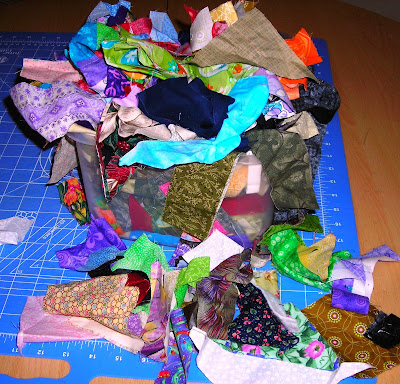
What you see above is my "Chip Basket." That's what I call the little container that I throw all my scrap bits of fabric and odd half square triangles, wonky strips and any other little leftover fabric pieces that accumulate as I piece together quilts. I even save those first cuts of yardage you are left with after you square the fabric up prior to rotary cutting. Either way, we all have these little scraps. As you can see by the photo my Chips had grown too large for the container I was keeping them in and this past weekend I thought I should go purchase a larger bin. "HOGWASH," I said out loud, as I quickly came to my senses! I decided right then that I would start using them up!


The Scrappy Pineapple Block to the left is what I came up with. I vowed to myself, and now to all of my online quilting buddies, that I will make one of these blocks every single day, no matter what, until I can at least put the lid back on the Chip Basket without having to sit on it to get it latched. Believe me, the bin can't stand that level of abuse...


I was given the most marvelous gift from my Quilt Guild secret pal recently and that helped me decide what direction I wanted to go. She had bought for me the June Tailor Perfect Piecing Transparent, Blank Foundation Sheets for paper piecing. This is a marvelous product, let me tell you! I stuck it in my printer, and it printed up the block lickity split. It is so easy to use, you can see right through it without having to hold it up to the light, and it tears away like butter but only when you are ready to tear it off! The photo to the right shows a block before I sewed on the scraps.


Here is the back of two blocks. See how easy it is to see through and thus to work with? It is a gift from the quilting Gods, in my humble opinion.


And here are Saturday and Sundays blocks, even sewn together. I have put the free 6 inch Paper Piecing Pineapple Block on the end of this post for everyone to use. Dig into YOUR scrap bins and make something bright, happy and useful today!


(you can scroll to the bottom of the embedded pdf file and click on "download" to print...)
Pineapple block 6 inch

Tuesday, December 16, 2008

Christmas Apron for an Angel!

The night before Thanksgiving, I truly had something to be thankful for. My sister-in-law and darling niece came down from Chicago to spend the holiday with us. Prior to Lily (she's the niece!) arriving, I had spoken to her on the phone regarding the Thanksgiving menu. She informed me that she really didn't like pie, but she sure did like Chocolate Chip Cookies.... Well, that meant that when she arrived we had to make chocolate chip cookies!

Lily is now four and a half, so I got to thinking that she was probably old enough to start to learn to sew. I knew it had to be a fast project, what with 4 year old attention spans being what they are and all, so I came up with a special apron for cookie baking. Lily sat right on my knee as we sewed the apron, she handed me all the pins, and helped guide the fabric through the machine. She even helped choose the fancy stitches for the pocket! The best part for me was that she was very proud of the apron she "sewed!" I am shamelessly cultivating future quilting and sewing buddies. Success and pride in beginning sewing projects will help. It is a wonderfully simple project and can be made from scraps. I made my pattern up as I went along, but at the bottom of my post is a list of great links to free apron patterns for the wee ones in your life!

This is Lily and her wonderful Mom showing off their great Pilgrim Hats for holiday.
Happy Sewing Everyone!