Thursday, December 10, 2009
Free Pattern Section on my Website
Monday, November 23, 2009
The Bitty Baby Patterns are done!
Thursday, November 19, 2009
My First Brown Bag Challenge - DONE!
SIDE NOTE: The wall hanging really isn't wonky. It just looks it because it was blowing in the wind.
Here is how the guild describes the challenge to us:
"What is a Brown Bag Challenge?" It is a time for you step out of your comfort zone to do something fun and receive something wonderful in return. The following outlines what you need to know in order to participate:
1. 3 COORDINATING FAT QUARTERS
2. Place the 3 COORDINATING FAT QUARTERS in a brown lunch bag with no markings (I will have extra bags if you don't have one); please no notes requesting a particular item to be made - that takes away from the challenge.
3. Bring your bag to the guild Summer Party
4. Hand it in
5. Near the end of the Summer Party, you will select a brown bag that is not yours for the challenge. From these three fat quarters we are instructed to do the following:
Use the 3 COORDINATING FAT QUARTERS on the front/outside of your project.
Please use at least 75% of the fabric provided on the project.
You made add as many other fabrics your heart desires - quilt store quality please.
The project MUST be QUILTED - machine or hand.
The project MUST be FINISHED.
The project should be no larger than a lap size.
Please put a label on your project.
We call the party that we have in November, "The Big Reveal" because that is where we reveal and give what we have made to the person who owns those three fat quarters. I didn't set this blog to post until after "The Big Reveal" because the surprise is such a big part of the fun.
Friday, November 6, 2009
A Cautionary Tale...
The definition of a Cautionary Tale is as follows: A traditional narrative (e.g., a fable, proverb, urban legend, or quilt) with a moral message warning of the consequences of certain actions or character flaws.
Character flaw: Self confidence and arrogance so high as to encourage my NOT following the pattern designer’s directions
Consequence: Bias issues
The quilt you see here is made from the Jelly Patch pattern. It's one of the patterns from the "Straight to the Point" series, published by Make It Easy which is a QuiltWoman.com Company. When I saw this quilt hanging in my local quilt shop, Country Quilts and Bears, I knew instantly I had to make it. A dear friend, Carol McPherson Hemmingsen was going to be teaching it. She did a marvelous job teaching and the class was one of the most enjoyable I have ever attended. Sadly, I was only able to attend day one of the two day class. That left me to finish the quilt myself. No problem, right?
And here is a shot of Carol holding up one of her finished Jelly Patch quilts. They really are gorgeous quilts!
Quilt Ingredients: I used the Berry Bliss Hoffman Bali Pops to make mine and Carol used an assortment of 2.5 inch batik strips to make hers. Both are the "throw" size. The only thing we changed was the outer border. The pattern called for a 4" border and Carol made hers 6". I then copied hers.
Friday, October 23, 2009
Ann the Gran picked up my patterns!
Wednesday, October 21, 2009
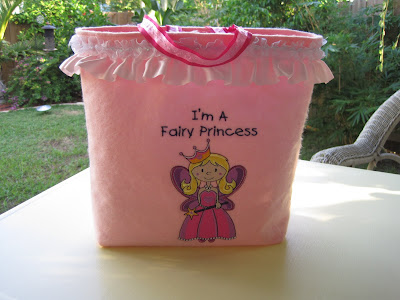
Halloween Treat Bags - FREE!
First I embroidered the designs - they were free downloads that I already had on my computer. I also used a font that came on my machine. I constructed them from felt using a plain tote bag pattern that I've had forever. I was so surprised, after a bit of digging around in the sewing room, to find that I already had everything I needed to fancy them up and make them worthy of my precious little peanuts!
Monday, October 19, 2009
The Magic Number is....
Last night I was working on a quilt project for my guild's Brown Bag Challenge and was doing a bit of designing. This project, which I can't show yet becuase it is always a surprise, required many different sized quarter square triangles. I was a trimming and guessing fool. A BIG light bulb went off after I had to rip one quarter square unit apart. It was laying on my cutting mat and I saw that the original square I had just used to make a three inch finished quarter square triangle was 4¼ inches square! I say to myself, "By George, I think I've got something here...." I quickly whipped up some samples to try this theory out and sure enough, it worked!
So this is what I learned:
The "magic number" for quarter-square triangles is 1¼ inch. All you have to do is add 1¼ inches to the required FINISHED SIZE of your quarter-square triangle unit.
So, for example, if you want a 3" (finished size) quarter-square triangle unit, you need to cut two squares that measure 4¼ inches each. It is perfect every time!
I am sure this is not new news to the majority of quilters, but it sure was news to me. I knew about adding 7/8 of an inch to the finished size to get perfect half square triangle units, but had never made quarter squares for an improvised pattern, and thus I just didn't know this. It's the simple things in life...........
Are there any other Magic Numbers out there I don't know?
Saturday, October 10, 2009
Quilted Media Case Is Done!
When I made this one, I was feeling old, so I used 30's fabric. All kidding aside, it has just been so handy for me. Now when I sew or clean, even when I am in my jammie pants, I have my iPod in my ears so the job goes so much faster and I'm not fussing to hold the iPod while I do it. Even when I am not using my iPod, I keep it in the case without the straps so it stays safe and sound, protected in its very own quilt.
Tuesday, October 6, 2009
Website Published!
Either way, I haven't been sewing. I have been computing and I can tell you this; I like sewing a whole lot better. I had to get the website done so I could add a new pattern, The Quilted Media Case, to the site. The old design, which I had built as well, wouldn't let me add a new product. I tried every which way but Tuesday to no avail, so back to the drawing board I went. Now all I have to do is change that photo up there in the top left hand corner to that of a quilt block or quilt. Heck, that should only take me three weeks to accomplish...
I'm open for any and all website design software suggestions. This is getting ridiculous! What have you used that is understandable and successful?
FYI: (from Wikipedia) The phenomenon of day and night is due to the rotation of a celestial body about its axis, creating the illusion of the sun rising and setting. Different bodies spin at very different rates, however. Some may spin much faster than Earth, while others spin extremely slowly, leading to very long days and nights. The planet Venus rotates once every 224.7 days – by far the slowest rotation period of any of the major planets. In contrast, the gas giant Jupiter's sidereal day is only 9 hours and 56 minutes.[1]
Tuesday, September 29, 2009
Quilting in Paradise
I had a great day and I got to meet more amazing, fun quilters. Aren't quilters just the best people to hang out with? First, let me introduce you to the wonderful lady above. That's Meg up there pinning her bias binding on the bib. She lives in Key West and came to The Seam Shoppe to take the class. She was a wiz at sewing and I loved her fabric choices. The watermelons were so cute, and she left with a darling bib ready to catch melon drips!
Wednesday, August 26, 2009
Inspired by the Outlander Series by Diana Gabaldon
I saw this embroidery design and immediately thought of Jamie Fraser. The design is the Celtic Tree of Life. Roughly, and very abridged, the design symbolizes the concept of the interconnectedness of life on earth. As often is the case, one thought led to another, and I knew I had to embroider the Celtic symbol onto a piece of duck cloth and make a bag for Sara to commemorate her summer with Jamie Fraser. Ahhhhhh......
Friday, August 21, 2009
Embroidered iPhone Case
Friday, July 31, 2009
Quilted Laptop Bag - Great Scrap Buster!
Friday, July 10, 2009
Scrappy Pineapple Beach Bag!
So here is what I made using my "Chip Basket" of scraps. A super huge beach bag that was made entirely out of scraps. First I made 19 six inch paper pieced pineapple quilt blocks using 100% scraps - and small scraps at that! The blocks made quite a dent in my Chip Basket and the lid is now neatly back on the container that was overflowing less than two weeks ago. For absolutely no new cost I have a very functional, very cute, large tote bag that is big enough to hold a beach blanket and at least three beach towels. In the photo below it has three large towels in it with room for much more!
Monday, June 29, 2009
Scrappy Pineapple Quilt Blocks
UPDATE 3/12/2010: I have uploaded the FREE 6 Inch Paper Piecing Pineapple Block Pattern to end of this post.
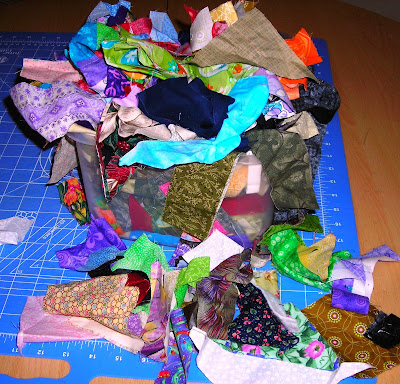
What you see above is my "Chip Basket." That's what I call the little container that I throw all my scrap bits of fabric and odd half square triangles, wonky strips and any other little leftover fabric pieces that accumulate as I piece together quilts. I even save those first cuts of yardage you are left with after you square the fabric up prior to rotary cutting. Either way, we all have these little scraps. As you can see by the photo my Chips had grown too large for the container I was keeping them in and this past weekend I thought I should go purchase a larger bin. "HOGWASH," I said out loud, as I quickly came to my senses! I decided right then that I would start using them up!
The Scrappy Pineapple Block to the left is what I came up with. I vowed to myself, and now to all of my online quilting buddies, that I will make one of these blocks every single day, no matter what, until I can at least put the lid back on the Chip Basket without having to sit on it to get it latched. Believe me, the bin can't stand that level of abuse...
I was given the most marvelous gift from my Quilt Guild secret pal recently and that helped me decide what direction I wanted to go. She had bought for me the June Tailor Perfect Piecing Transparent, Blank Foundation Sheets for paper piecing. This is a marvelous product, let me tell you! I stuck it in my printer, and it printed up the block lickity split. It is so easy to use, you can see right through it without having to hold it up to the light, and it tears away like butter but only when you are ready to tear it off! The photo to the right shows a block before I sewed on the scraps.
Here is the back of two blocks. See how easy it is to see through and thus to work with? It is a gift from the quilting Gods, in my humble opinion.
And here are Saturday and Sundays blocks, even sewn together. I have put the free 6 inch Paper Piecing Pineapple Block on the end of this post for everyone to use. Dig into YOUR scrap bins and make something bright, happy and useful today!
(you can scroll to the bottom of the embedded pdf file and click on "download" to print...)
Thursday, June 18, 2009
Recycled Clothing and Stash Busting
I was so pleased with the first one that I got to digging, and found some old purple velvet, embroidered two designs on it and ended up with the bag you see on the right.
.
.
.
.
.
.
Tuesday, May 26, 2009
One Thing Led to Another...
Here is the back. I love it!
And then, as luck would have it, I had just enough left over to make Lucy TWO "drool bibs." Here is one of them.
And when I finished the drool bibs, I remembered the fabric I had left over from the aprons I made my daughter and her girls for Mother's Day, and, well, that led to this bib here on the right ------->